 In this post, I discuss how to setup your own domain with Zoho Mail, a hosted email solution from Zoho. Similar to Google Apps, Zoho provides a set of online business tools including office apps, project management, and contact management. At the time of this post the hosted email package has a free option as well as higher tiers for users who need more options. The biggest selling point for Zoho is that none of their apps have advertisements, and so if you are bothered by other webmail solutions that feature ads, Zoho seems to be a good alternative solution. Other than webmail access, the other reasons to use Zoho is that it works with desktop email clients, smartphones, and tablets.
My Requirements For An Email Solution
In order of importance, here is what I was looking for in an email solution.
Integrates with your Domain name
- I wanted an email solution that would work with my current personal domain that my family uses.
iPhone and iPad Support
- Everyone in the family has an iPhone, iPod, or iPad that they can use for email.
Apple Mail Support
- Oh, we do use our Mac computers every now and then, so we need desktop mail.
IMAP
- I want to keep email on the server, and not worry about losing it. I can also manage my email from my smartphone when I have time. This is really convenient.
Cost
- Free if possible, but am willing to pay for a good solution on a yearly basis.
Ad-free
- Not having my kids bombarded with advertisements is a good thing.
Zoho’s Instructions
Step 1: Verify domain ownership
Please verify your domain ownership. This is required to prevent imposters from using domains to send malicious messages. You can follow either the CNAME method or HTML method for verification.Step 2: Add / import users to your organization
As the administrator of your organization, you have a Control Panel link in your user interface. In the Control panel, click User Details on the left list of options and click Add User option on the top. You can also import a list of users by selecting the Import User option.Step 3: Migrating data to Zoho Mail
We recommend you to test migration for 2 users before pointing MX records.Step 4: Point MX records to Zoho
Point the Mail Exchanger (MX) records to Zoho to start receiving mails to your inbox.
Changing My eMail
Steps 1 and 2 were pretty easy. Since I only have 4 users accounts, it took a few minutes to setup my four users in the Control panel. I skipped Step 3, I don’t really keep a lot of personal email. My current email was stored in Apple Mail and I was fine leaving it there. The interesting step is number 4. The Internet works via DNS. The domain naming system allows everyone and everything to find each other on the network. This is accomplished by DNS having different types of records to point requests to the right place. In the case of most personal domains, you have two different parties involved. The first is a domain registrar who takes care of your domain registration. The second is your hosting provider, usually for shared hosting this is a cPanel type hosting provider. When someone tries to email you at user@some_domain_name.net, a lookup is made to the root DNS authority for the .net domains, your registrar is what adds your domain to the DNS authority servers. The root server then sends you to your nameservers specified. Your nameservers are at your cPanel hosting provider. The final step in the lookup is to see what your cPanel nameserver has for what is called the MX records. The MX records have the server that processes your email and ideally where the email is going to go.
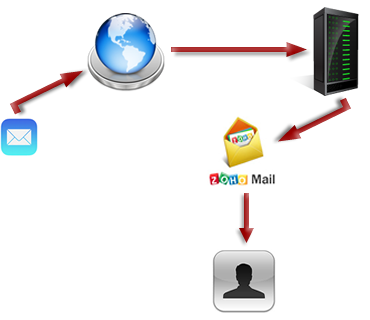
Your current hosting provider has MX records for its own email processing. What needs to be done, is to remove the current MX records and replace them with MX records that point to Zoho’s servers. This way only your email, emails sent to user@some_domain_name.net, will route to Zoho, but everything else will still be at your current hosting provider. To do this most cPanel hosts make it easy to do this now. Log into your cPanel control panel and scroll down to the Email section. You want to click open the MX Entry icon.

You will first choose your domain name that you want to change the MX records for. This is your main domain. First add the MX entries as Zoho instructs, then remove your current record for your host. When the changes are complete, it should look similar to this:

The DNS changes take a matter of minutes to a couple of hours to propagate to the rest of the internet.